Both dealers and property managers on a Remote Management site are able to move out tenants.
To get started, navigate to https://aiphone.cloud/remotemanagement and log in with your credentials, including the branch's IXG Portal account, if prompted. If multiple sites are displayed, click the desired site from the list.
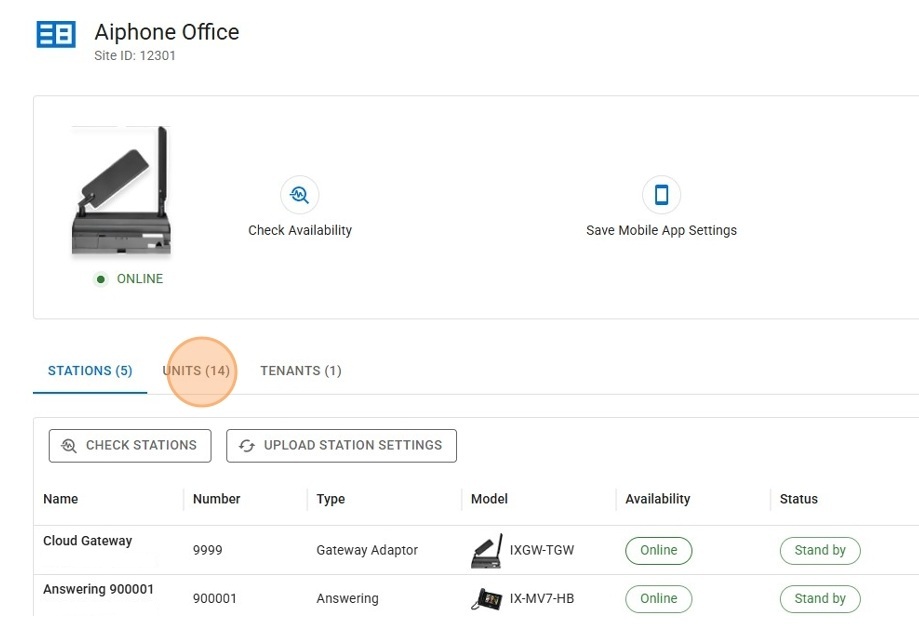
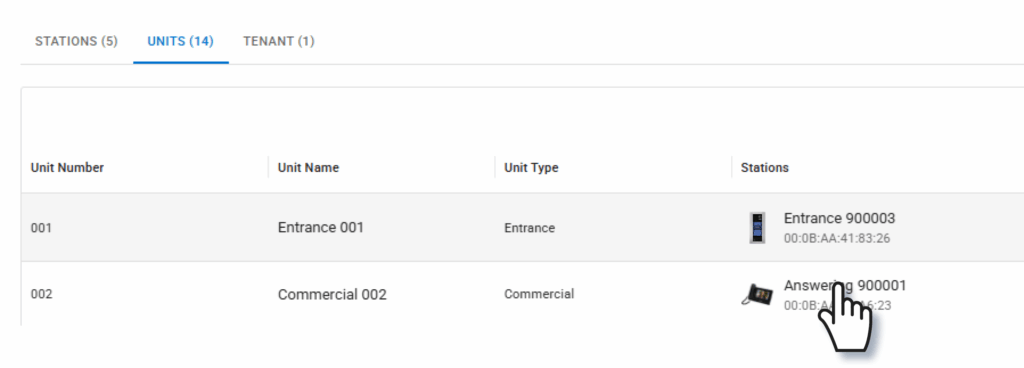
On the Site Detail page, click Units to display the unit list.
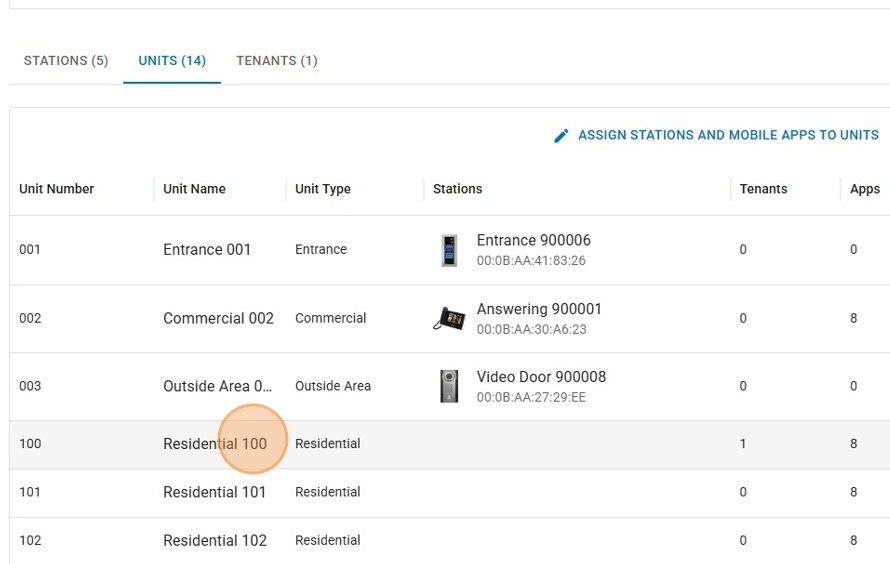
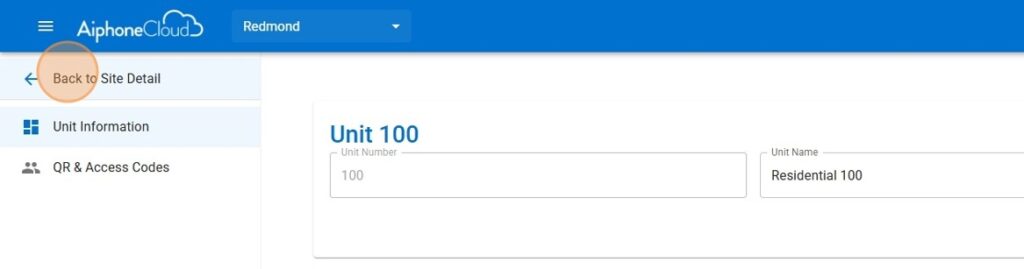
Click a unit from the list. This will open up a new page.
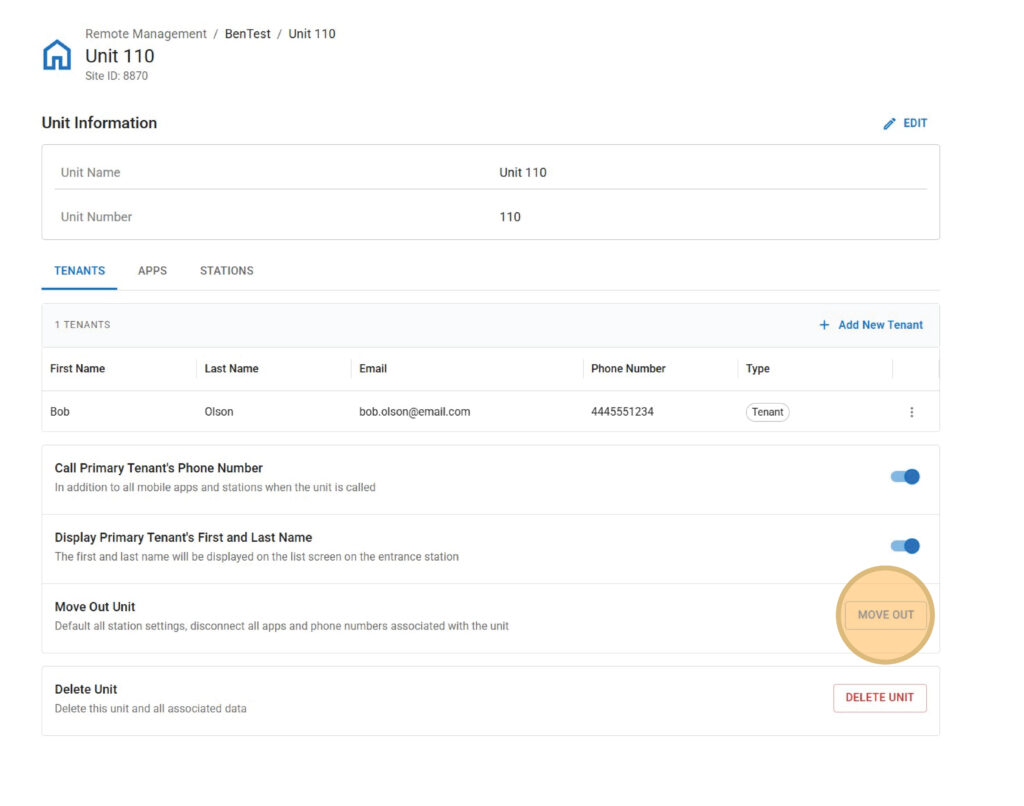
Under the Tenants submenu, the site’s tenants will be listed. Click Move Out.
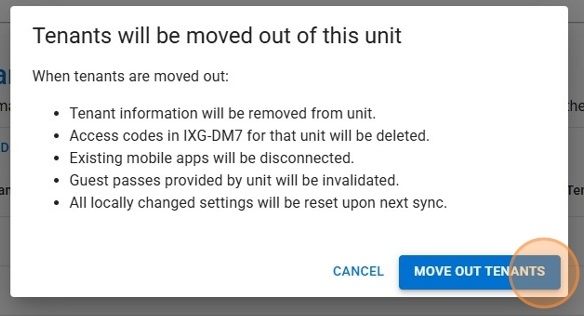
A pop-up window will appear, explaining what information will be lost once the tenant is moved out. Click Move Out Tenants to confirm.
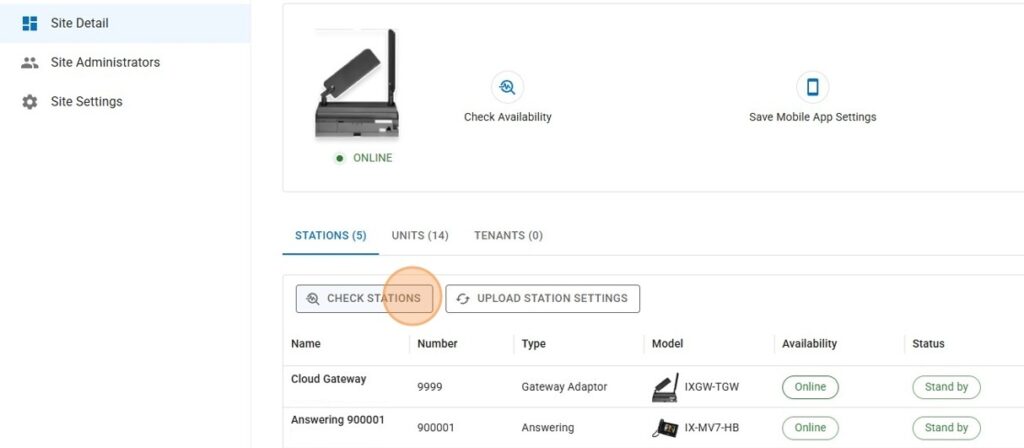
This will remove the tenant from Remote Management, but the settings will need to be applied to the IX | IXG Series stations. Click Back to Site Detail.
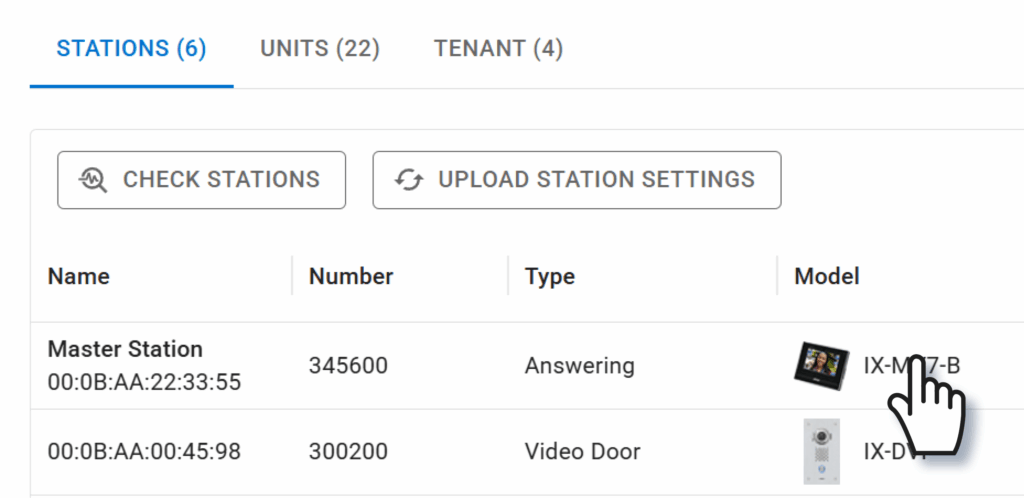
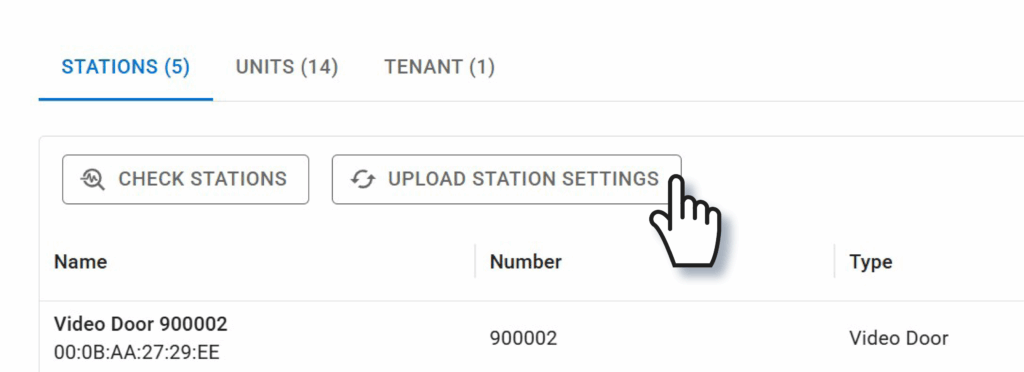
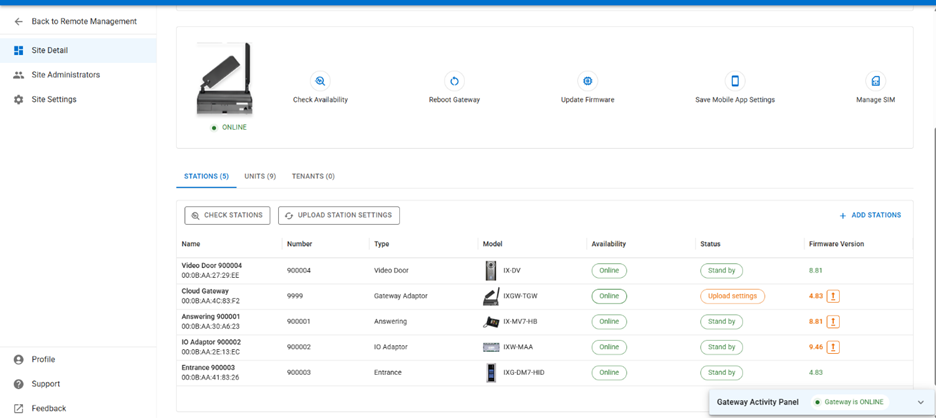
Click Check Stations to confirm that the stations are online and able to be accessed by AiphoneCloud.
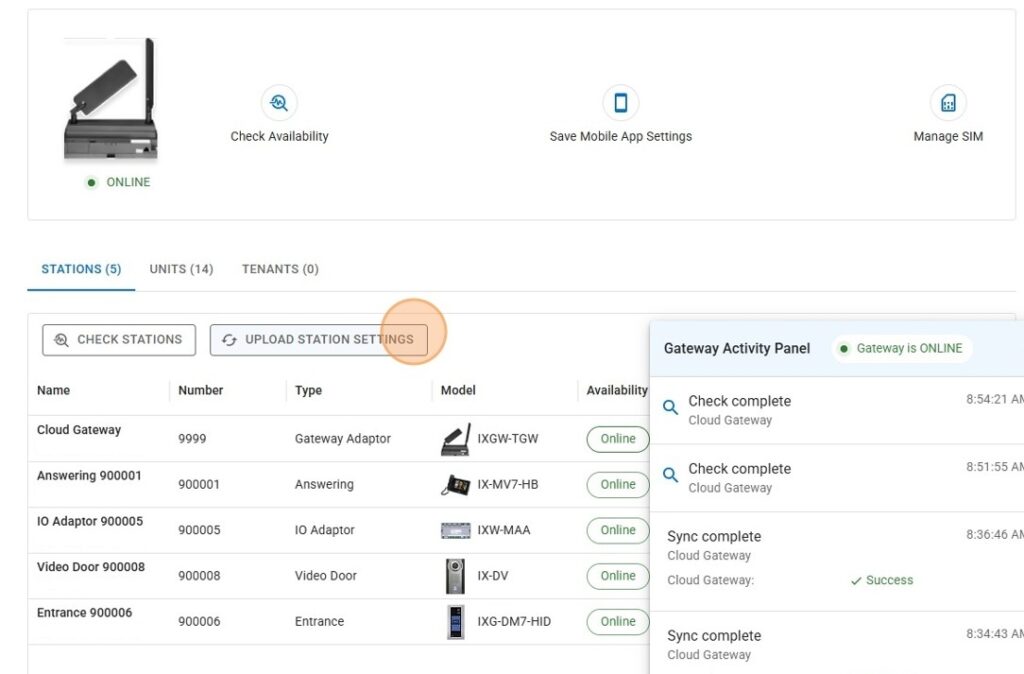
If they pass the checks, click Upload Station Settings. Wait for the upload process to complete.
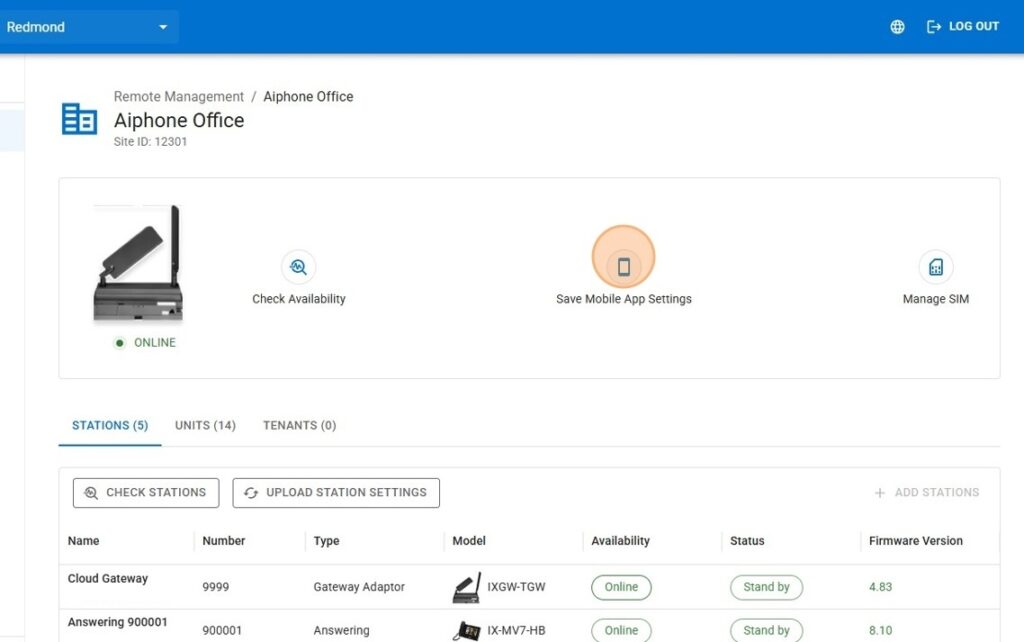
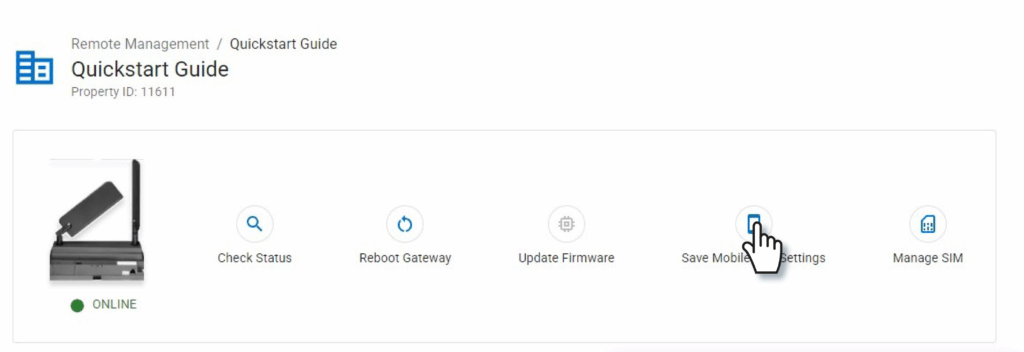
If the tenants had any registered IXG Mobile apps, click Save Mobile App Settings to finish removing them.
After this step, the tenants will be fully removed from the system.
Note: AiphoneCloud and Remote Management are dynamic services, and future updates may change the appearance of some items.
Tip: AiphoneCloud and Remote Management are always being improved, so the interface may appear different than in these screenshots.
Each IXG mobile app, answering station, and entrance station has an address book. The default settings depend on the type of system being configured.
Commercial: All stations in the system are in each stations’ address book.
Multi-Tenant address books are determined by the device or IXG Mobile app’s Building and Unit assignment.
IXG-DM7 entrance stations can call Guard, Residential, and Commercial Units in the same building. IXG-MK guard stations and IXG Mobile apps in Guard Units can call any unit in the same building.
Stations and apps in Residential and Commercial Units can call other stations in their Unit, and any IXG-DM7 and IXG-MK stations in the same building.
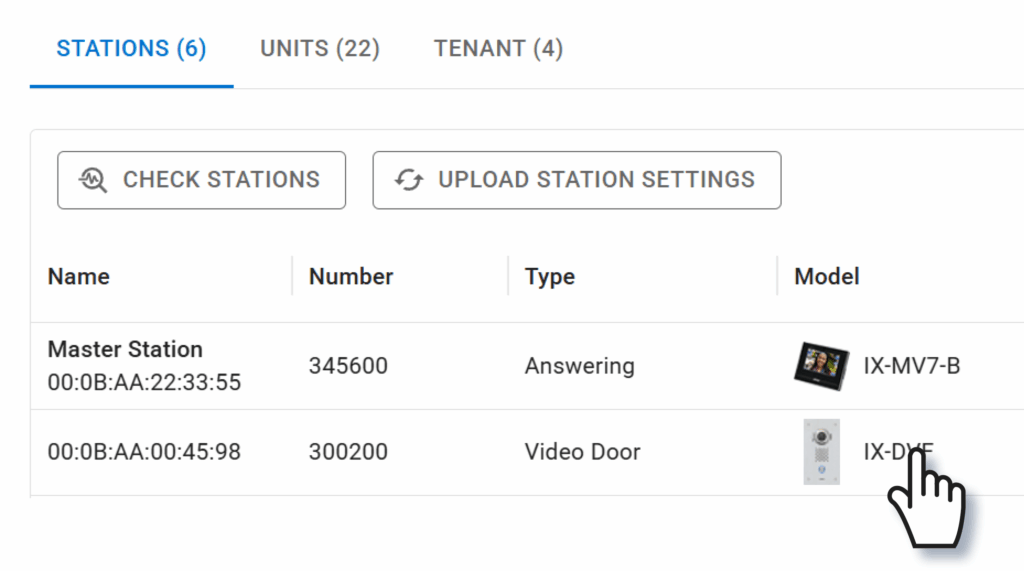
To add or remove stations from an address book, click on the station’s name in the Stations menu.
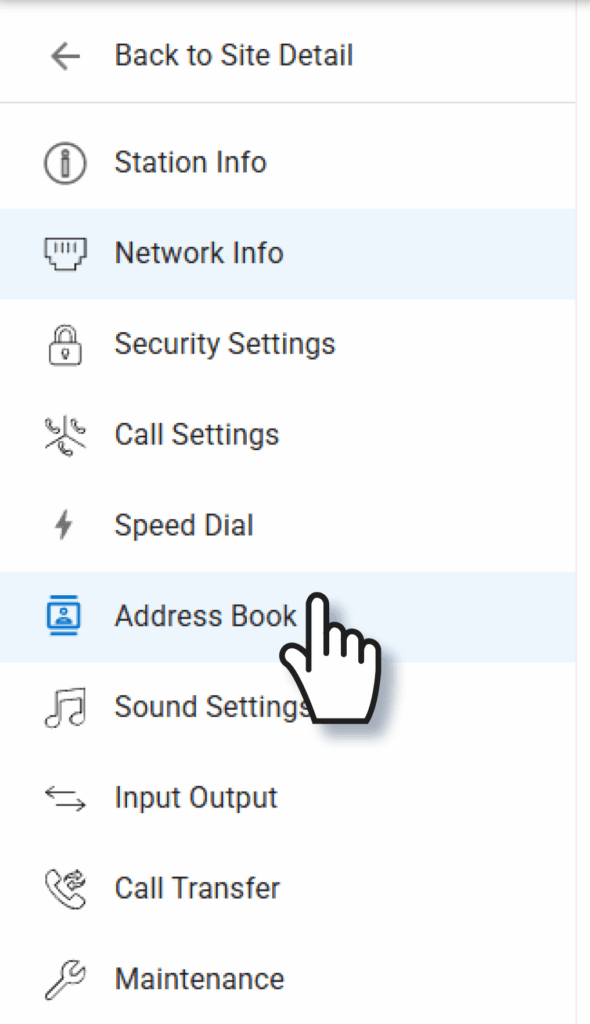
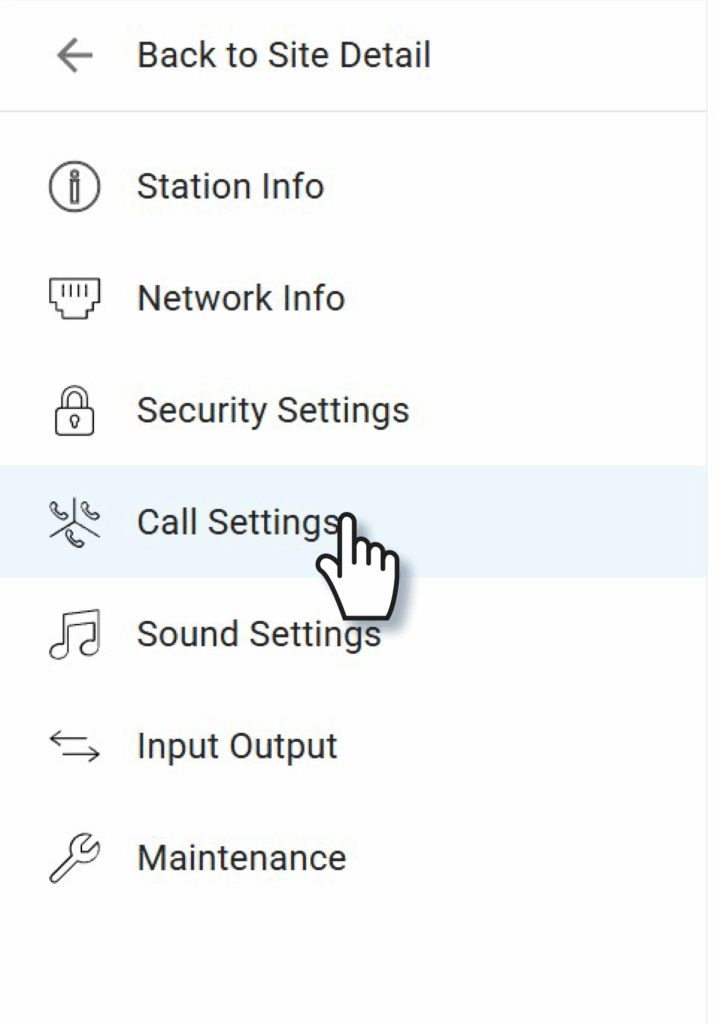
Click Address Book on the left menu.
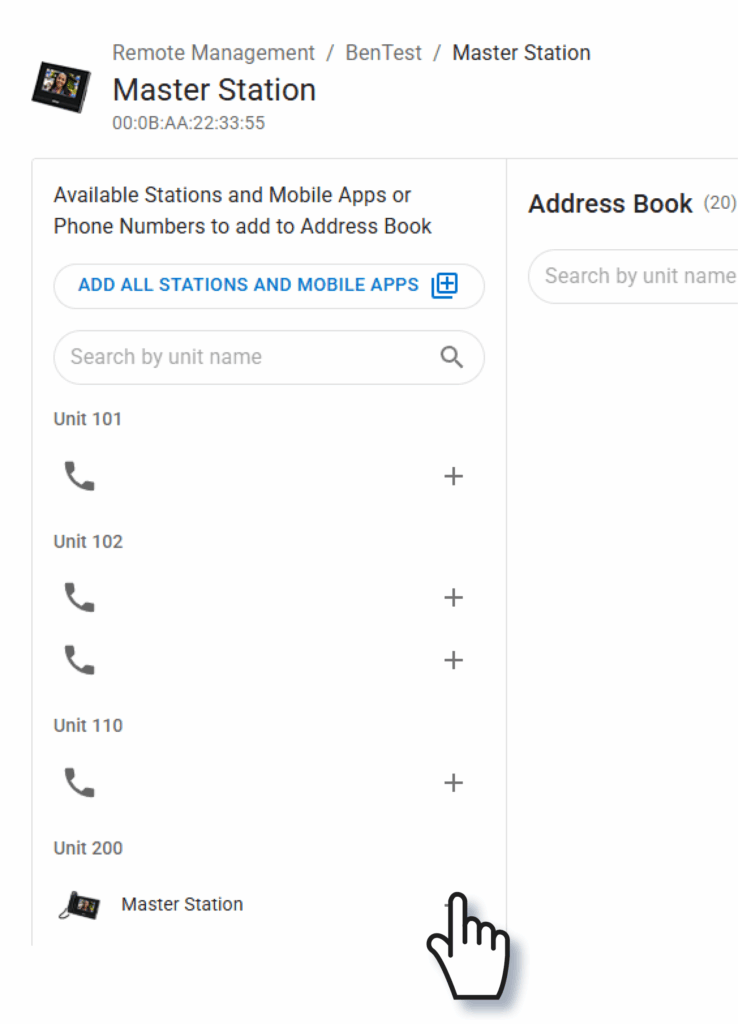
All stations can be added at once by clicking Add All Stations And Mobile Apps. To add stations individually, scroll through the units, stations, or phone numbers on the left and click the + symbol to select a station, phone number, or group of mobile apps.
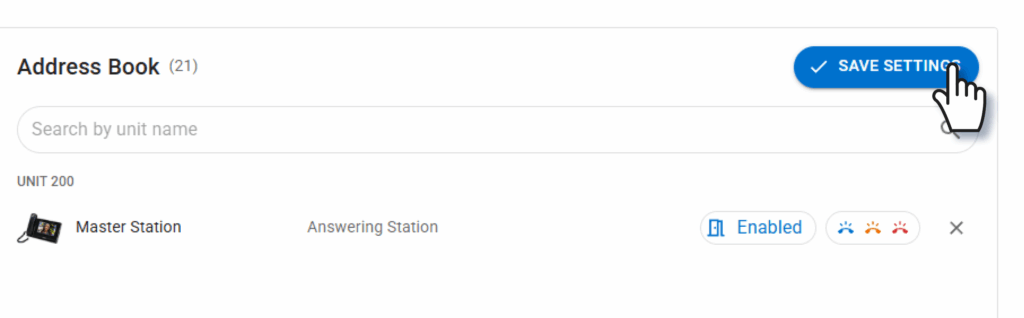
To remove a station that has already been added, click the X symbol to the right. Once the desired stations are in the address book, click Save Settings. Repeat this for all stations that need to have their address books adjusted.
Click Back to Site Detail in the top left to return to the main page. To apply the settings to the stations and apps click Upload Station Settings. If mobile apps are used on the site, also click Save Mobile App Settings.
With that, the stations' address books will be updated.
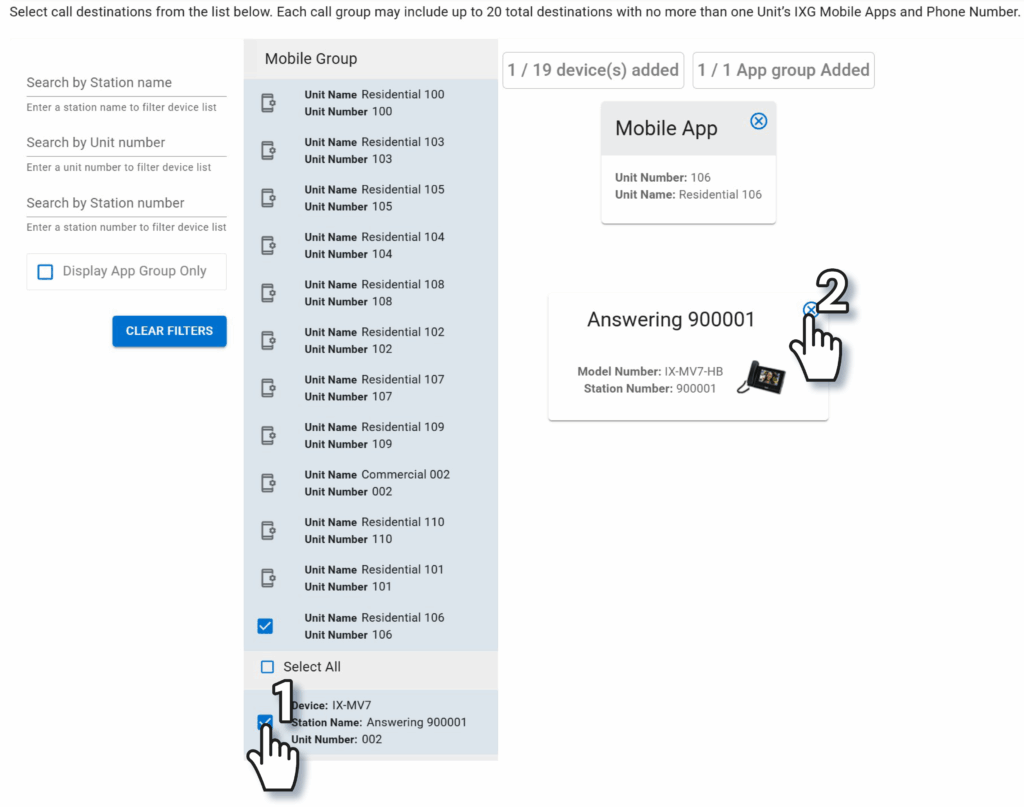
Either use the search bars to find a specific station or unit, or find it under the Mobile Group column. Up to 20 call destinations can be selected using the check boxes under Mobile Group. To remove a station from the call list, click the X symbol next to a station or app group.
Tip: Onlyone group of mobile apps can be added to the call group, and only one phone number. Up to 20 answering stations can be included.
Once everything is configured, click Save Changes in the top right corner of the page.
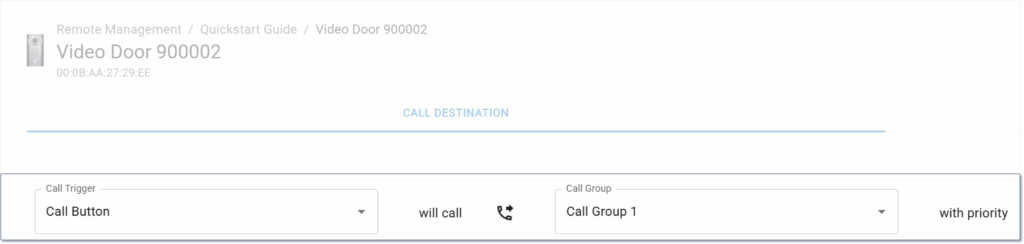
Tip: By default, the station’s built-in call button is selected to program. This is the most common setting, unless an external device or a multi-button door station is used. Use the drop-down menu under Call Trigger to switch to different inputs as needed, and the drop-down menu under Call Group to assign the call method a different destination. The steps for programming the call destinations are otherwise the same.
Click Back to Site Detail in the top left to return to the main page. Repeat the previous steps for each door station to be configured.
To apply the settings to the stations and apps click Upload Station Settings. If mobile apps are used on the site, also click Save Mobile App Settings.
With this, the stations will be able to communicate with each other as configured.
Both dealers and property managers on a Remote Management site are able to move out tenants.
To get started, navigate to https://aiphone.cloud/remotemanagement and log in with your credentials, including the branch's IXG Portal account, if prompted. If multiple sites are displayed, click the desired site from the list.
On the Site Detail page, click Units to display the unit list.
Click a unit from the list. This will open up a new page.
Under the Tenants submenu, the site’s tenants will be listed. Click Move Out.
A pop-up window will appear, explaining what information will be lost once the tenant is moved out. Click Move Out Tenants to confirm.
This will remove the tenant from Remote Management, but the settings will need to be applied to the IX | IXG Series stations. Click Back to Site Detail.
Click Check Stations to confirm that the stations are online and able to be accessed by AiphoneCloud.
If they pass the checks, click Upload Station Settings. Wait for the upload process to complete.
If the tenants had any registered IXG Mobile apps, click Save Mobile App Settings to finish removing them.
After this step, the tenants will be fully removed from the system.
Note: AiphoneCloud and Remote Management are dynamic services, and future updates may change the appearance of some items.
Tip: AiphoneCloud and Remote Management are always being improved, so the interface may appear different than in these screenshots.
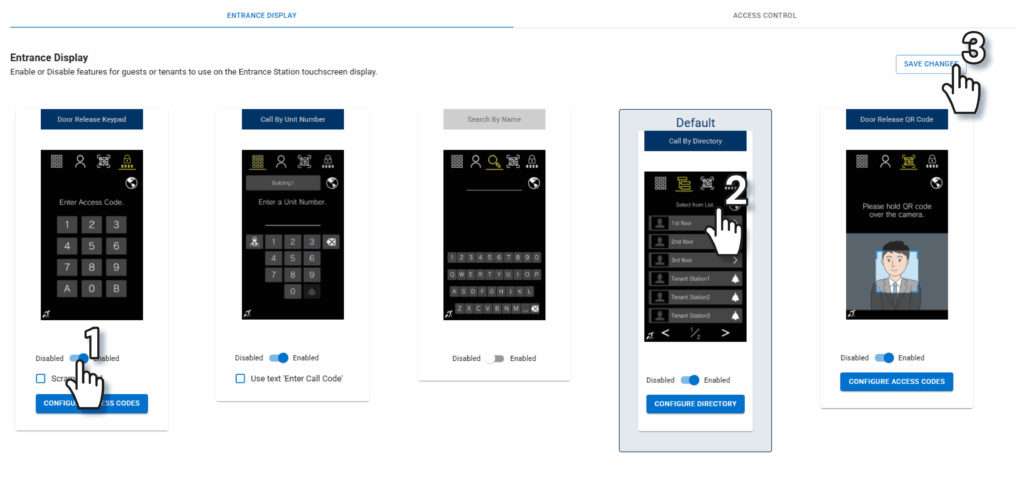
Overview
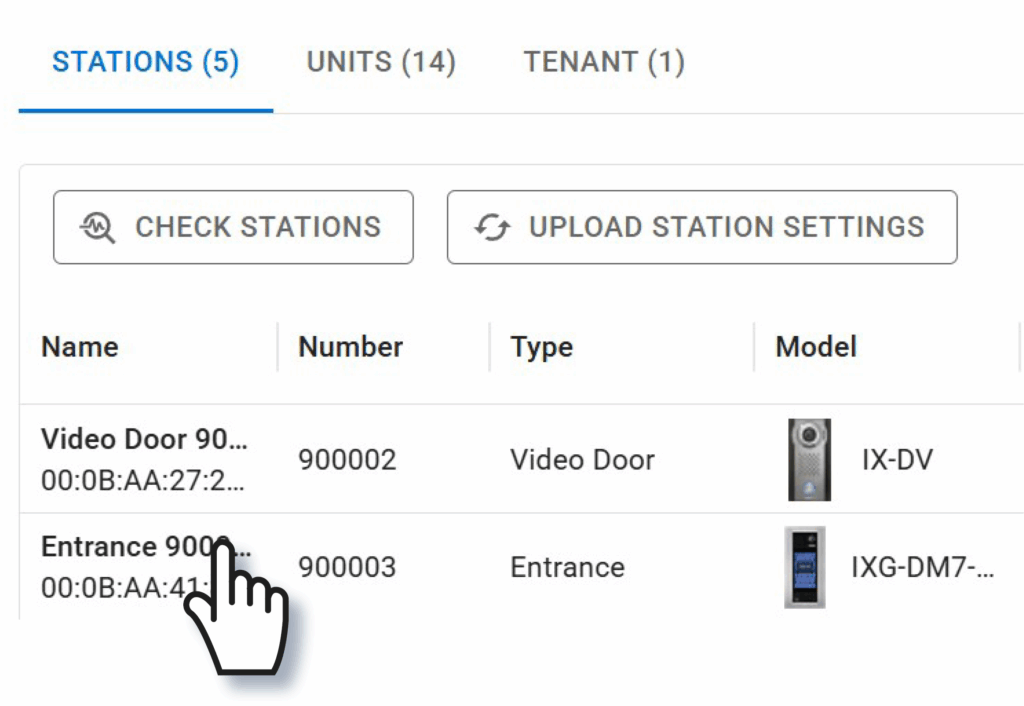
IXG-DM7-HIDA entrance stations have a variety of options that can be utilized by guests. To begin configuring a station, click on its name in the Stations section.
Click Entrance Settings to display the options.
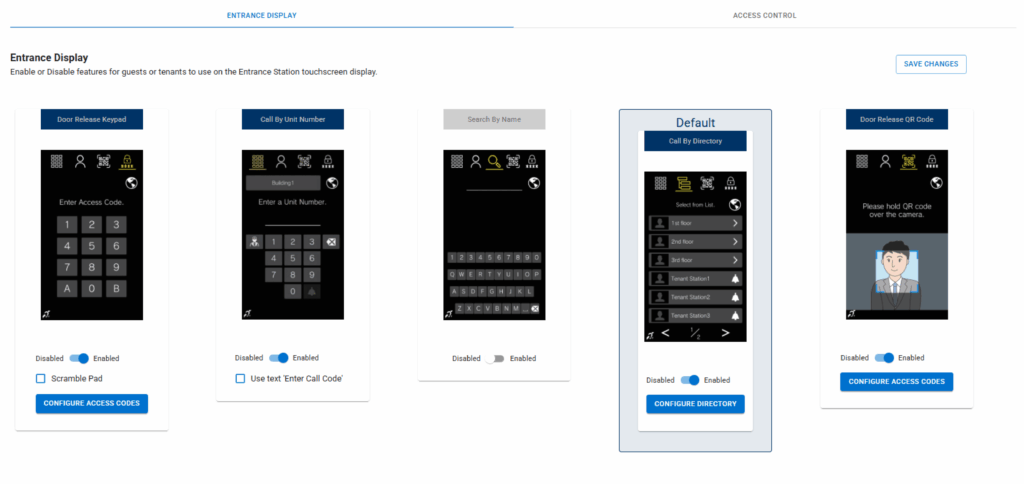
There are five features available:
Door Release Keypad: Allows residents to enter a code to unlock the door.
Call By Unit Number: Call a unit by entering its number.
Search By Name: Type in a resident or unit name to find the unit to call.
Call By Directory: Displays an individual call button for each unit.
Door Release QR Code: Residents can send visitors a QR code to scan to unlock the door
For each feature, click the blue slider beneath to enable or disable it.Click anywhere else in the box to set an enabled feature as the default view.
Tip: A view must be enabled before configuring its settings.
Two features have additional options that can be configured.
Door Release Keypad: Enable or disable Scramble Pad. This shuffles the numbers each time the keypad is displayed, making it more difficult for observers to guess the codes.
Call By Unit Number: Change the text to display “Enter Call Code” instead of the regular title. This does not change the functionality in any way.
Once all settings have been adjusted, click Save Changes in the top right. The settings will not be pushed to the station until they are uploaded in the last step in this article.
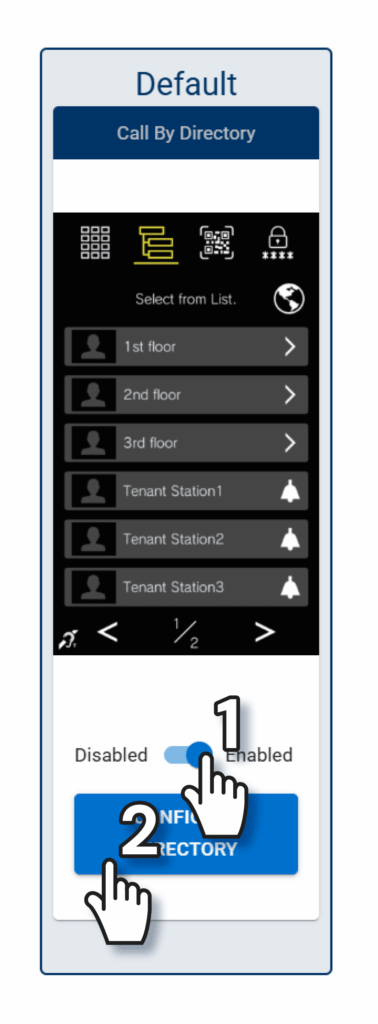
Configuring the Directory
From this page, enable Call By Directory if it hasn’t been yet, then click Configure Directory.
A pop-up window will appear, showing the available units in the station’s address book. Either click Select All or click the individual units to add them to the Call Directory List to the right, or click the X symbol next to a unit to remove it. The units can be reordered in the Call Directory List by dragging and dropping them. Once everything is configured, click Save.
Configuring Access Codes
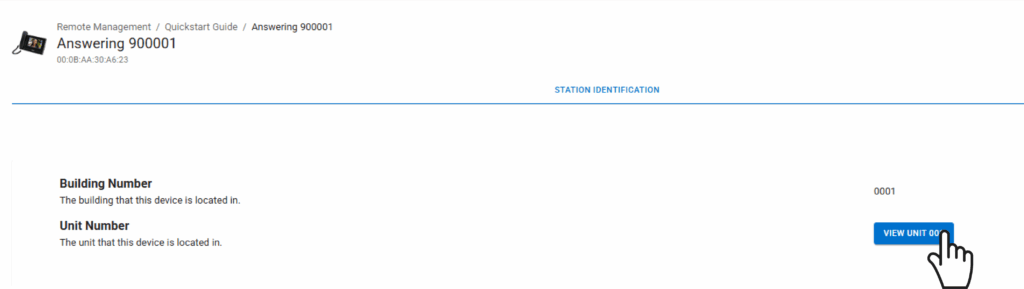
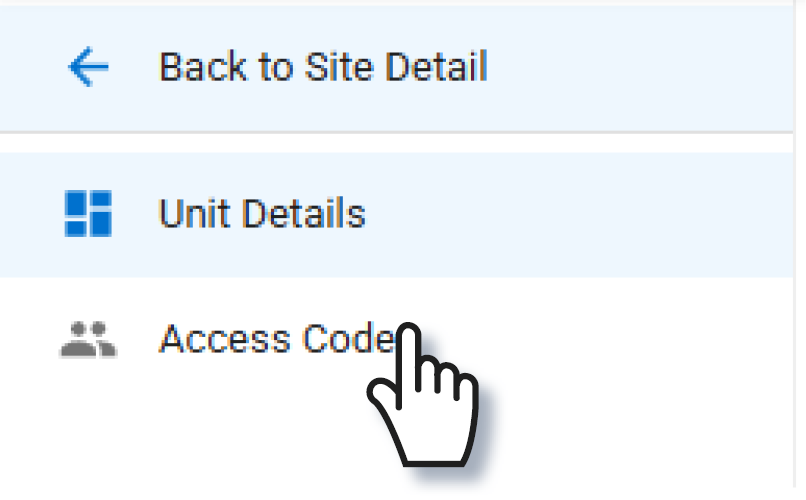
To set codes for the keypad or adjust QR code settings, navigate back to the main page by clicking the back arrow in the top left corner. From the main screen, click Units. Select the desired unit.
Click View Unit to the right.
Click Access Codes to the left.
This page will display every entrance station in the unit’s address book. One code can be applied to them all by entering it in the Shared Access Code bar and clicking Apply To All. Otherwise, enter them in the section for each individual station.
To allow mobile apps in the unit to send Guest Passes to visitors, click Enable QR Access under the entrance station.
Tip: No matter how many tenants, stations, or mobile apps are in a unit, each unit is only assigned one shared code.
Once settings are finished, click Save Changes. Navigate back to the main page and repeat these steps for each unit.
Uploading Settings
To apply the settings to the stations and apps, click Upload Station Settings on the main page. If mobile apps are used on the site, also click Save Mobile App Settings.
With this, the entrance stations will be ready to use.